Fix Messy Cells Fast: How to Wrap Text in Excel
October 22, 2025

Photo by Paul Hanaoka on Unsplash
Ever type a long note into Excel, hit Enter, and suddenly half your sentence disappears behind the next column? We’ve all been there.
When your spreadsheet starts looking like a jumble of half-visible words and cut-off text, you don’t need to start widening every column by hand. The quick fix is Wrap Text—a feature that keeps everything tidy, readable, and right where it belongs.
Let’s walk through exactly what wrapping text does, how to use it in Excel 365, a few tricks for older versions of Excel, and what to check if it doesn’t seem to work.
What “Wrap Text” Really Means
In Excel, each cell is like a single box on a grid. Normally, if your text is longer than the cell width, it either spills over into the next cell or gets cut off entirely when that next cell contains data.
Wrap Text in Excel changes that behavior. It tells Excel to break the text automatically and display it on multiple lines inside the same cell. The row height expands so the full content is visible.
Without text wrap, a cell might show:
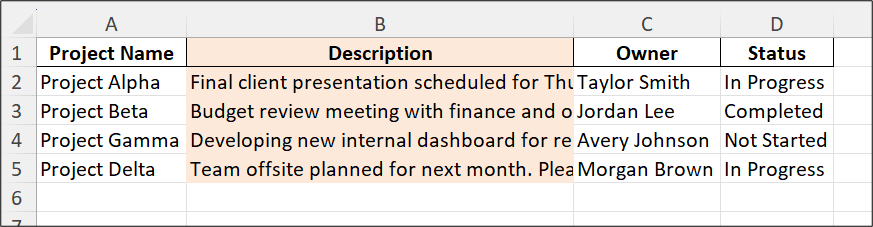
With wrap enabled, Excel displays it neatly:
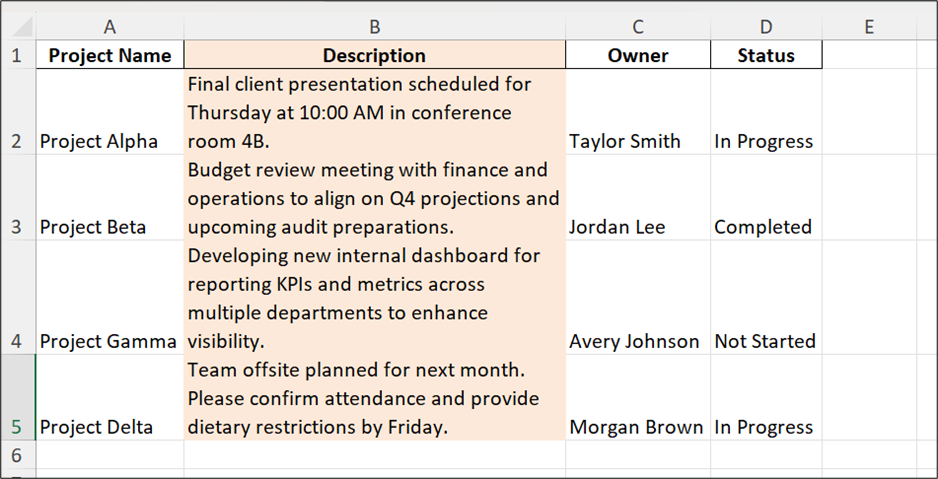
The text stays inside its borders, and your sheet instantly looks more polished.
Methods for Wrapping Text
There are several methods available for wrapping text. We’ll take a look at several of them.
Option 1: Use the Wrap Text Button (Excel 365)
The fastest method takes just one click.
- Select the cell or cells you want to format.
- Go to the Home tab on the Ribbon.
- In the Alignment group, click Wrap Text. That’s it! Excel automatically adjusts the row height so all lines are visible.
If your text still looks cut off, double-check the row height:
- Go to the Home tab on the Ribbon and select Cells → Format → AutoFit Row Height. This ensures the row expands just enough to show everything.
Tip: The Wrap Text button acts as a toggle. Click it once to turn wrapping on, again to turn it off.
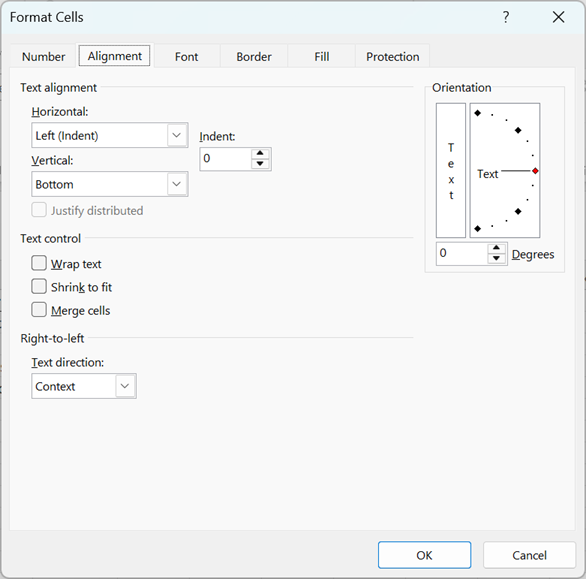
Option 2: Format Cells Dialog Box
For users who like precision or are already adjusting cell settings, you can also enable wrapping through the Format Cells window.
- Select the cell(s).
- Right-click and choose Format Cells or press Ctrl + 1.
- Go to the Alignment tab.
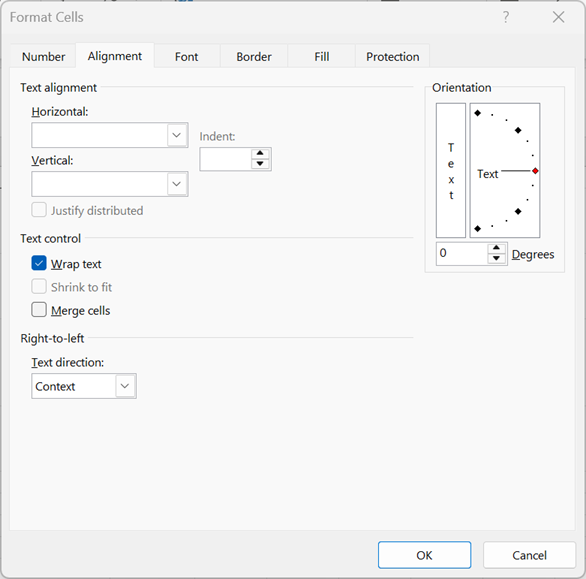
- Check the box labeled Wrap text.
- Click OK.
This method is handy if you’re adjusting alignment, orientation, or indentation at the same time. It also works in older versions of Excel, so it’s a safe go-to for anyone using Excel 2016 or earlier.
Option 3: Shortcut for Fast and Hands-Free
If you prefer keyboard commands, try this: Alt → H → W
That’s three quick keys in sequence—not pressed together. It tells Excel: Home tab → Alignment section → Wrap Text. Once you get used to it, it’s faster than reaching for your mouse.
Option 4: Control Where Lines Break Using Manual Line Breaks
Sometimes you don’t want Excel deciding where to break lines—you want full control. Maybe you’re writing a label, a note, or a multiline heading. Here’s how:
- Double-click the cell (or press F2) to edit.
- Place your cursor where you want the line to break.
- Press Alt + Enter.
This inserts a manual line break right at your insertion point. Even if you resize the column later, Excel keeps your custom break exactly where you placed it. This works in older versions of Excel too.
When Wrap Text Doesn’t Work and How to Fix It
Every Excel trainer knows this pain: you click Wrap Text, but the cell looks exactly the same. Here’s what might be happening and how to fix it.
The Row Height Is Locked
If the row height was set manually, Excel won’t expand it automatically. To fix it:
1. Select the row or rows.
2. Click the Home tab on the Ribbon.
3. Choose Format and then choose AutoFit Row Height
The Cell Is Merged
Wrap Text in Excel behaves unpredictably in merged cells. Sometimes it looks fine; other times the text vanishes or clips. If that happens, try this:
- Select the merged cells.
- Right-click and choose Format Cells or press Ctrl + 1.
- Go to the Alignment tab.
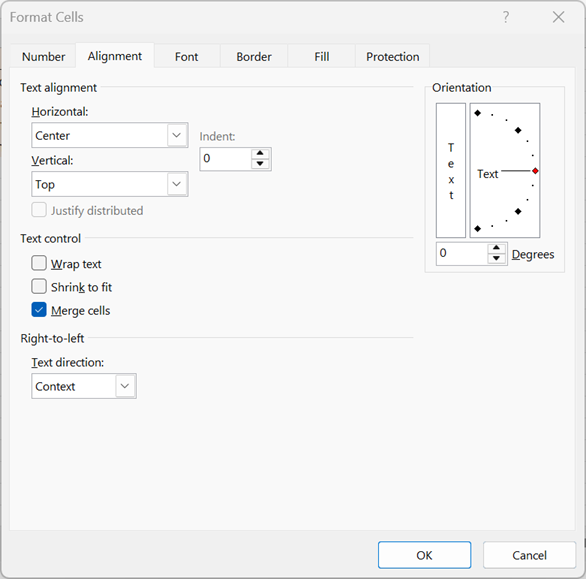
- Click to uncheck Merge cells.
- Click OK.
The Alignment Is Set To “Fill”
Used more frequently in legacy versions of Excel or in older spreadsheet files to create borders, forms, or repeat patterns, a horizontal alignment set to “fill” will prevent text wrapping from working correctly.
- Select the cell or cells set to “fill.”
- On the Home tab of the Ribbon, click the Left, Center or Right alignment button to reset.
Now when you attempt to apply wrapping, it will work correctly.
You’re Using Excel for Web
Excel’s online version supports Wrap Text, but row heights don’t always auto-adjust perfectly. If the text still looks cut off, manually drag the bottom border of the row to expand it.
Hidden Line Breaks or Extra Spaces
Copied text, especially from Word or web pages, can bring invisible line breaks or extra characters that confuse Excel. You can use Find & Replace (Ctrl + H) to remove them or retype the cell cleanly before re-wrapping.
How Wrap Text Works in Older Versions of Excel
If you’re still using Excel 2010, 2013, or 2016, the feature works almost the same way but you might notice a few differences.
- The Wrap Text button is still under Home → Alignment, though the icons look slightly different.
- Automatic row height adjustments aren’t always as responsive, so you may need to AutoFit rows more often.
- In some legacy versions, wrapping large blocks of text across many cells can slow performance, so proceed with caution.
- Protected or shared workbooks can limit format changes like wrapping.
If you run into those quirks, just remember: unprotect, wrap, and reprotect if needed. The basics still hold true.
Formatting Tips for Clean, Readable Sheets
Wrap Text is simple, but it’s even better when paired with good formatting habits. Here are a few tips to make your data shine:
Keep columns consistent
If one cell in a column wraps and others don’t, your table can look uneven. Consider applying Wrap Text to the whole column for a uniform layout.
Avoid wrapping every cell
Wrapping everything makes rows tall and spreadsheets cluttered. Use it strategically—only where text truly needs multiple lines.
Combine wrapping with alignment
For neatly stacked text, use Middle Align or Top Align along with wrapping. It keeps text blocks looking balanced. These commands can be found here:
- Select the cells you wish to format.
- Right click in the selected area and choose Format Cells.
- Click the Alignment tab.
- Use the Vertical alignment options to center text inside an expanded cell.
- Click OK.
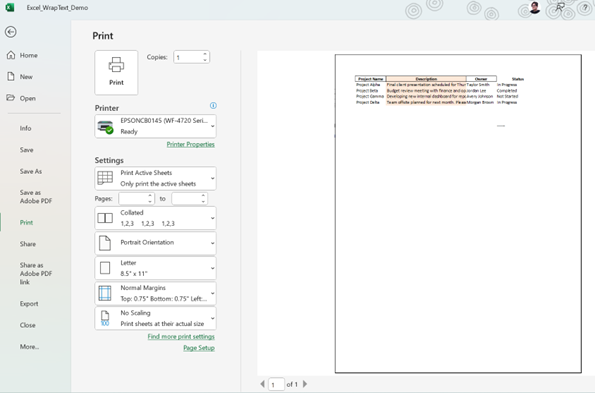
Watch Your Printing Layout
Before printing, always preview your output. Wrapped text can expand rows, pushing data onto new pages unexpectedly. Print preview can be accessed in the Print dialog box. Press CTRL + P or click the File tab and then select Print.
Wrapping Up (Pun Intended)
Messy text doesn’t have to ruin your spreadsheet. The Wrap Text feature is one of Excel’s simplest, most satisfying fixes—and it takes just seconds to master.
Whether you’re working in Excel 365 or an older version, remember these essentials:
- Turn on Wrap Text from the Home tab or Format Cells dialog.
- Use Alt + Enter for manual control.
- Check row height, merged cells, and alignment if it’s not behaving.
Once you get comfortable with wrapping, your spreadsheets will look cleaner, print better, and be easier to read—no column stretching required.
Keep Building Your Excel Skills with Intellezy
Ready to go beyond Wrap Text and take full control of your spreadsheets? Intellezy’s online Excel courses make it easy for you and your team to level up, step by step. Start where you are, and move forward with confidence:
- Excel Training for Beginners
- Master the fundamentals, including:
- Cell formatting
- Data entry best practices
- Basic formulas and printing tips
- Excel Intermediate Training
- Strengthen your skills with:
- Conditional formatting
- Sorting and filtering
- Charts and PivotTables
- Our Advanced Excel Course
- Unlock advanced techniques such as:
- Logical and lookup functions
- Named ranges and data validation
- Power tools like macros and data models
- And many more Excel courses!
Don’t just fix messy cells: master Excel. Our comprehensive training video library features dozens of Excel courses, along with hundreds of other trainings on need-to-know topics like Microsoft 365, AI tools, leadership, cybersecurity, business skills, and more.
Begin your free trial today or fill out the form below to get started!
Frequently Asked Questions (FAQs)
Request Your Free Trial
Explore our complete library to see how you can maximize your team’s efficiency, performance, and productivity.
Submitting...
Topics & Tags:
Related Articles
-
No Tag
What Is Simulation Training? Benefits, Types, and Use Cases
-
No Tag
The Soft Skills Gap Holding Your IT Team Back
-
No Tag
How to Manage a Diverse Team: Strategies for Inclusive Leaders
-
No Tag
Role-Based AI Training: A Guide for L&D and HR Leaders
-
No Tag
Executive Presence: What It Is and How to Build It
-
No Tag
Why Every Organization Needs a Competency-Based Training Program
-
No Tag
Microlearning Matters: Benefits, Examples, and More
-
No Tag
Team Leader Training: How to Build Leaders That Drive Results


